
1. Selecting Leads for Export
Before exporting, you must select the participants you wish to extract. You can select leads individually, by group, or in bulk using keyboard shortcuts.
Use the tick box next to a participant's name to select them individually.
To select a range: Click the first lead's checkbox, hold the Shift key, and click the checkbox of the last lead in the range. All leads in between will be selected automatically.


Platform Tip!
"Selecting the checkbox at the top of a group header will select every lead within that specific category at once!"
2. Executing the Export
Once you have selected your leads, a management menu will appear at the bottom of the screen.
- ➜ Click the Export button in the bottom floating menu.
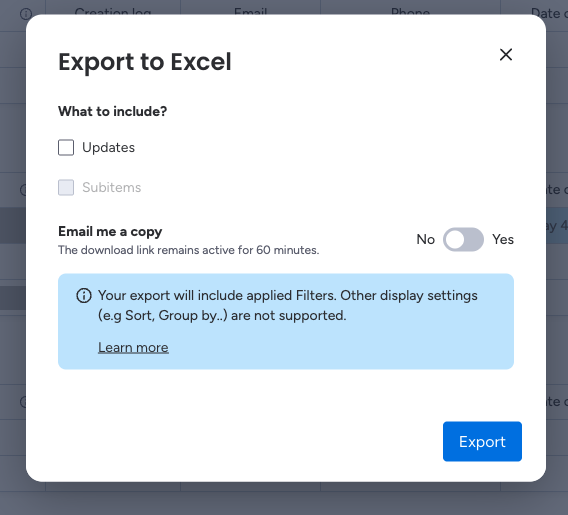
- ➜ A window will open giving you two choices: Email a copy or Export to Excel.
Choosing 'Export to Excel' will immediately generate a .xlsx file containing all columns currently visible on your board.
3. Post-Export Tracking
After the export is complete, the leads will remain selected. To maintain a clean workflow, it is best practice to indicate which leads have been handled.
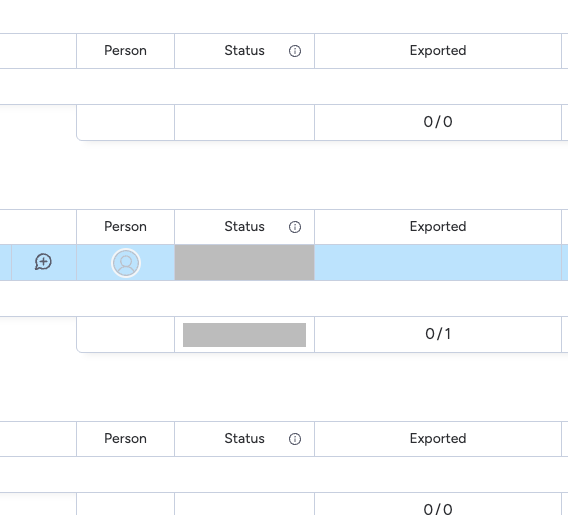
Why use the "Exported" column?
- ● Visual Confirmation: Instantly see which data has been moved to external systems.
- ● Future Filtering: You can filter your board to show only leads where "Exported" is empty, helping you find "new" leads that still need to be processed.
Export Workflow Summary
Use Checkboxes or Shift+Click
Process via Bottom Menu
Mark for Audit Tracking